> For the complete documentation index, see [llms.txt](https://docs.klai.studio/llms.txt). Markdown versions of documentation pages are available by appending `.md` to page URLs; this page is available as [Markdown](https://docs.klai.studio/engineering-reference-docs/setting-up-auth0/getting-started.md).

# Getting started

### Creating a tenant

If you already have a tenant to be used, you can skip to the [next section](https://www.notion.so/Setting-up-Auth0-8b9d86fabcb14bbdbf4b8848a3458793?pvs=21).

After signing in to your Auth0 account, on the top left corner click on the dropdown button and select <mark style="color:red;">`Create tenant`</mark>

<figure><img src="https://2586933017-files.gitbook.io/~/files/v0/b/gitbook-x-prod.appspot.com/o/spaces%2FheC5LgoLOS4Tub2LLUGt%2Fuploads%2FGX81voCRHhLoipucgfVO%2Fimage.png?alt=media&amp;token=5ff89d51-3004-4e4c-bd37-396ab1f0fb69" alt=""><figcaption></figcaption></figure>

Choose a domain, region and environment for this tenant.

<figure><img src="https://2586933017-files.gitbook.io/~/files/v0/b/gitbook-x-prod.appspot.com/o/spaces%2FheC5LgoLOS4Tub2LLUGt%2Fuploads%2FYOKD2YR2fm49v5HBWxbJ%2Fimage.png?alt=media&amp;token=cdcc6a20-8647-4a8d-86a8-809a8be6c544" alt=""><figcaption></figcaption></figure>

### Creating Application

On the left bar, mouse over it and click the <mark style="color:red;">`Applications`</mark> option, then click on <mark style="color:red;">`+ Create Application`</mark>

<figure><img src="https://2586933017-files.gitbook.io/~/files/v0/b/gitbook-x-prod.appspot.com/o/spaces%2FheC5LgoLOS4Tub2LLUGt%2Fuploads%2FDHfS5d4JtIPwa1GsI2iX%2Fimage.png?alt=media&amp;token=9355d461-6303-4fc5-a15d-0c8f5650c125" alt=""><figcaption></figcaption></figure>

Choose a name to identify your app, select <mark style="color:red;">`Regular Web Applications`</mark> and click on <mark style="color:red;">`Create`</mark>.

<figure><img src="https://2586933017-files.gitbook.io/~/files/v0/b/gitbook-x-prod.appspot.com/o/spaces%2FheC5LgoLOS4Tub2LLUGt%2Fuploads%2FU8oO69GyXbKAGeuYlSBs%2Fimage.png?alt=media&amp;token=56d11534-8533-4972-9553-e61f19b47467" alt=""><figcaption></figcaption></figure>

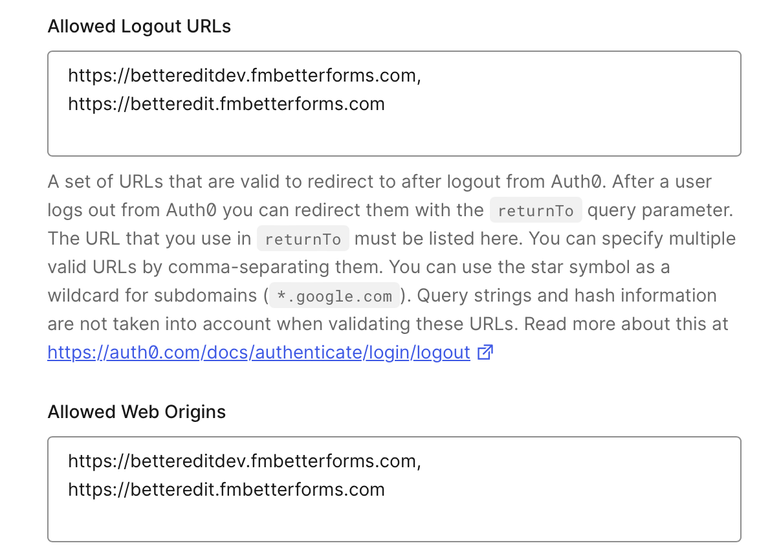
Once it’s created, it should redirect to your app’s <mark style="color:red;">Quick Start</mark> tab. Go to the <mark style="color:red;">Settings</mark> tab of your application and fill the following fields under <mark style="color:red;">`Application URIs`</mark>.

### Additional customizations

Still under the <mark style="color:red;">`Settings`</mark> tab, you can add a logo that will be used on the default pages used by Auth0 (Login, Reset Password, etc.).

A link from an asset uploaded to BF could be used here.

<figure><img src="https://2586933017-files.gitbook.io/~/files/v0/b/gitbook-x-prod.appspot.com/o/spaces%2FheC5LgoLOS4Tub2LLUGt%2Fuploads%2Ftr1gxnXF8Zm5hs9FYVgj%2Fimage.png?alt=media&amp;token=bfd26340-61d7-4b4f-ac1d-449acc38958e" alt=""><figcaption></figcaption></figure>

The following image shows other options that could be customized according to your policies.

<figure><img src="https://2586933017-files.gitbook.io/~/files/v0/b/gitbook-x-prod.appspot.com/o/spaces%2FheC5LgoLOS4Tub2LLUGt%2Fuploads%2Ffg9ZaNBzHjaaqvTDu90b%2Fimage.png?alt=media&amp;token=352a8f4b-7375-455e-aa79-4d89ff62df9d" alt=""><figcaption></figcaption></figure>

### **Add your Dev and Production Domains**

<figure><img src="https://2586933017-files.gitbook.io/~/files/v0/b/gitbook-x-prod.appspot.com/o/spaces%2FheC5LgoLOS4Tub2LLUGt%2Fuploads%2F0mUqIRKOIU2mOmNSlcyp%2Fimage.png?alt=media&amp;token=8e34d527-b58e-4473-b812-7fca5d552078" alt=""><figcaption></figcaption></figure>

### **Allowed Callback URLs**

This URL will be used by Auth0 to redirect the user back to your BF app, and the value should be as follows:JavaScriptCopyhttps\://yourapp.domain.com/oauth/auth0/callback​If multiple domains are being used, multiple domains can be added using comma as the separator.JavaScriptCopyhttps\://yourapp1.domain.com/oauth/auth0/callback, <https://yourapp2.domain.com/oauth/auth0/callback>